Adding Tests to an Executable
The Idea
What to do when you want to add tests around code that lives in an executable project? My preferred solution is to move everything into a new library, create a new test project and link it with the new library. It might look like a daunting task, but as you will see it’s not. In this post, you will also find alternative solutions that might be better suited for your context. Explanations are based on MSBuild and C++, but the strategies can be transferred to other build tools and languages.
The Problem
Consider an application where all the code resides in a single executable project.
As a disciplined software developers you want to add tests around to the code before changing the behavior.
A Simple Solution
The first solution is to add tests using assertions at the beginning of the main.
#include <cassert>

int power(int base, int exp)
{
    // This is not valid for 0 and negative exponents

    int result = base;
    while(--exp > 0) {
        result *= base;
    }

    return result;
}

int WinMain()
{
    assert(power(2, 2) == 4);

    // Rest of the code
}
Note: I often use this strategy for fast hypothesis validations.
This is a very simple way of testing, but it will only work when assertions are active, which by default are only active in debug. We could add assertions to the release configuration, but that will have an impact on the whole project and that’s not what we want.
A Better Solution
Instead of assertions, we want to use a test framework that will allow us to log test results. We will go with µt since it’s a macro-free testing framework (https://github.com/boost-ext/ut).
#include <boost/ut.hpp> // https://github.com/boost-ext/ut

// power function omitted for simplicity

using namespace boost::ut;

"power"_test = [] {
    expect(power(2, 2) == 4_i);
};

int WinMain()
{
    // Rest of the code
}
There is still an issue with this solution because we don’t have a console to output the result. We could write the output to a file, but this is not convenient. As disciplined software developers, we want a solution that gives us maximum efficiency in the long term, so we will add a console to our project.
Expand to see how to start a project with a console
-
Open the project properties.

-
Select All Configurations.
-
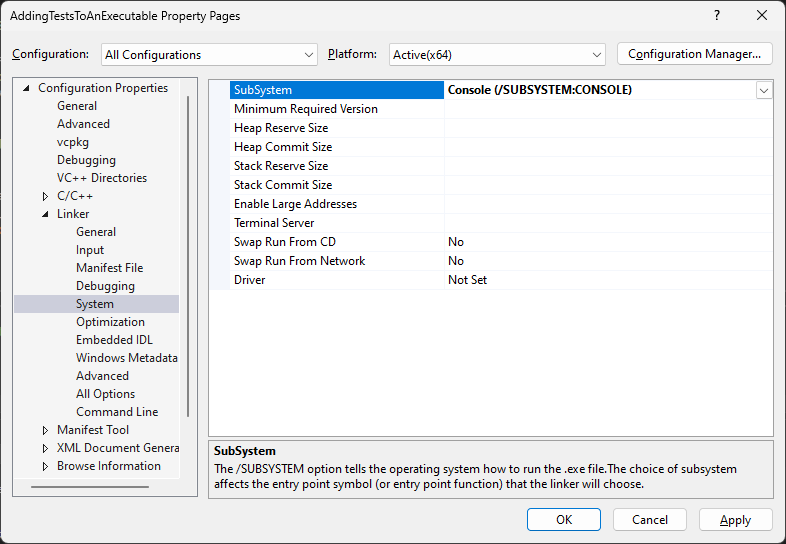
Change the SubSystem property from Windows to Console in the Linker/System pane.
-
Apply and close the Properties dialog.
-
Change the main function signature from WinMain to main.
This isn’t great as it will display a console while the application has a GUI. We could add the console only for the debug configuration, but we won’t be able to know if everything is fine in the release configuration.
The solution to this is to create new configurations, DebugTest and ReleaseTest, and show a console only for those configurations.
Expand to see how to create the new DebugTest configuration
-
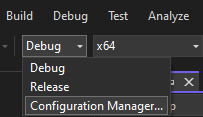
Open the Configuration Manager.
-
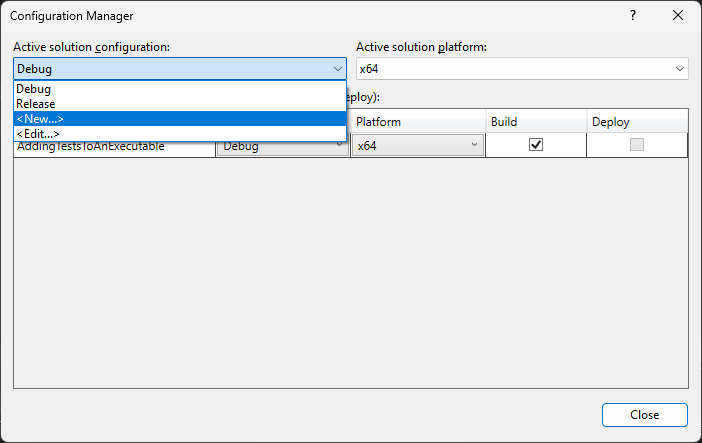
Open the configuration creation dialog.
-
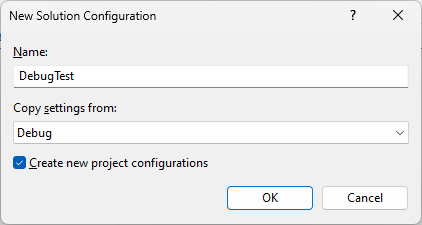
Create the new DebugTest configuration from the debug configuration.
This will force us to compile the same code twice for each configuration since the Windows and Console configurations will have the same code apart from the main function signature.
A Step Further
Another way is to pass a command argument when launching the executable to allow for a special execution path that will display a console at runtime and execute the tests instead of the application. As you will see in the following snippet, we need to change the WinMain function signature to include the command line arguments.
#include <windows.h>

#include <boost/ut.hpp> // https://github.com/boost-ext/ut

// power function omitted for simplicity

using namespace boost::ut;
suite<"global"> errors = [] {
    "power"_test = [] {
        expect(power(2, 2) == 4_i);
        };
    };

void ParseArguments(std::string arguments)
{
    // Parse arguments and show console if asked
}

int WINAPI WinMain(HINSTANCE hInstance, HINSTANCE hPrevInstance, PSTR lpCmdLine, int nCmdShow)
{
    ParseArguments(lpCmdLine);

    // Rest of the code
}
This is a viable solution, but we need to add logic to execute the tests and that can be avoided.
Note: I have used this solution in a production system to display a console when using a simulator.
An Ad Hoc Solution
The following solution is a lot trickier, but it works and I have built production grade system with it. When you are compiling a translation unit (aka a cpp file), you generate an obj file. The executable is somewhat formed by linking all the obj files in the project. It’s mainly the same process for a library and it’s possible to generate a library from the same obj files that were used for the executable. The solution consists of generating a library as a post-build step during the building of the executable. I won’t go into the details here, but you can contact me if you want them. The main reason to discard this solution is because it involves some magic that can easily be avoided with another solution.
Note: A colleague and I developed this solution because, before Visual Studio 2019, there was only a 32-bit version and Visual Studio had a hard time managing solutions with a large number of projects, often resulting in crashes. By using this technique we were able to reduce the number of projects in our solution.
The Solution
My preferred solution, and the one that you should use, is to move everything to a separate library project, rename the main function, and link the new library to the executable. The executable project will only contain a main and it will delegate everything to the renamed main function that has been moved to the library project. A new test project can now be created to add our tests and linked with the newly created library.
Expand to see how to move code from an executable to a library and add an executable for tests
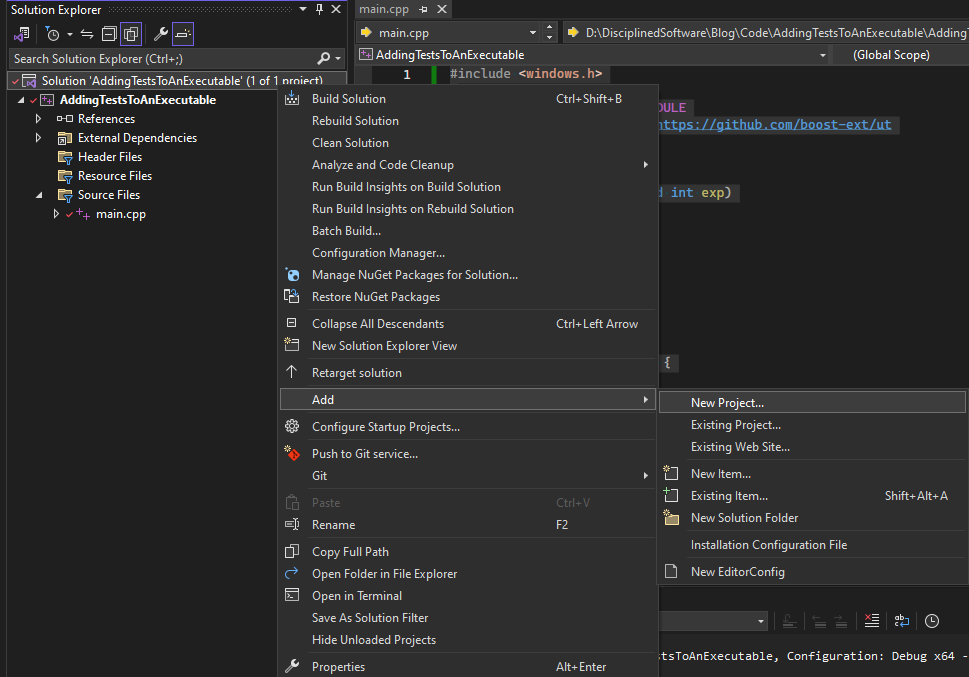
- Create a static (or dynamic) library project.
- Add a new project.
- Select the Static Library project template.
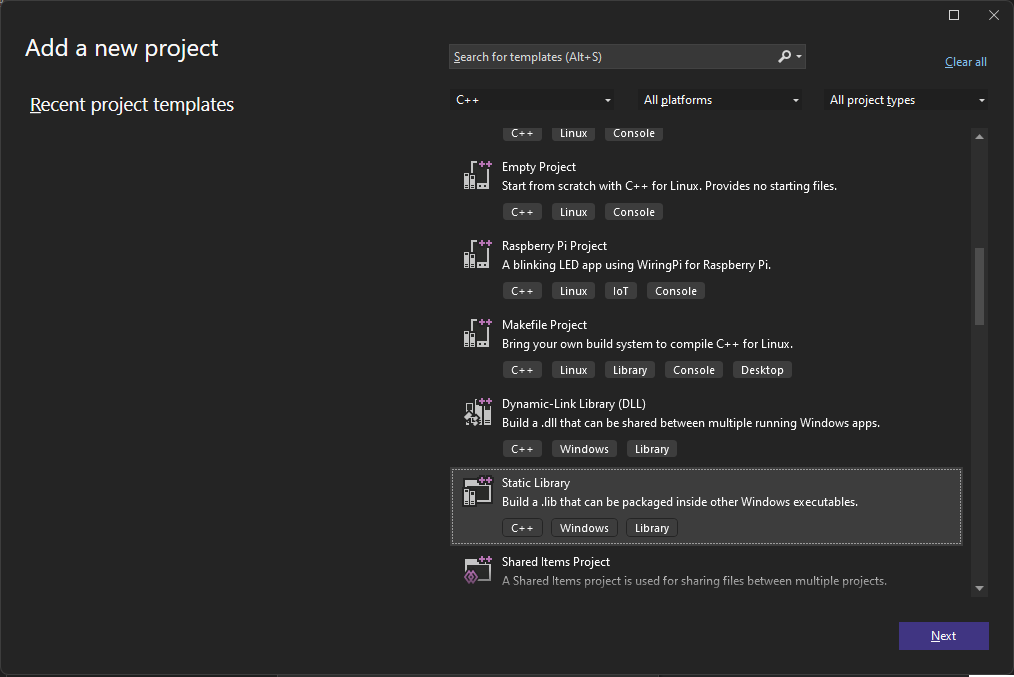
- Add a new project.
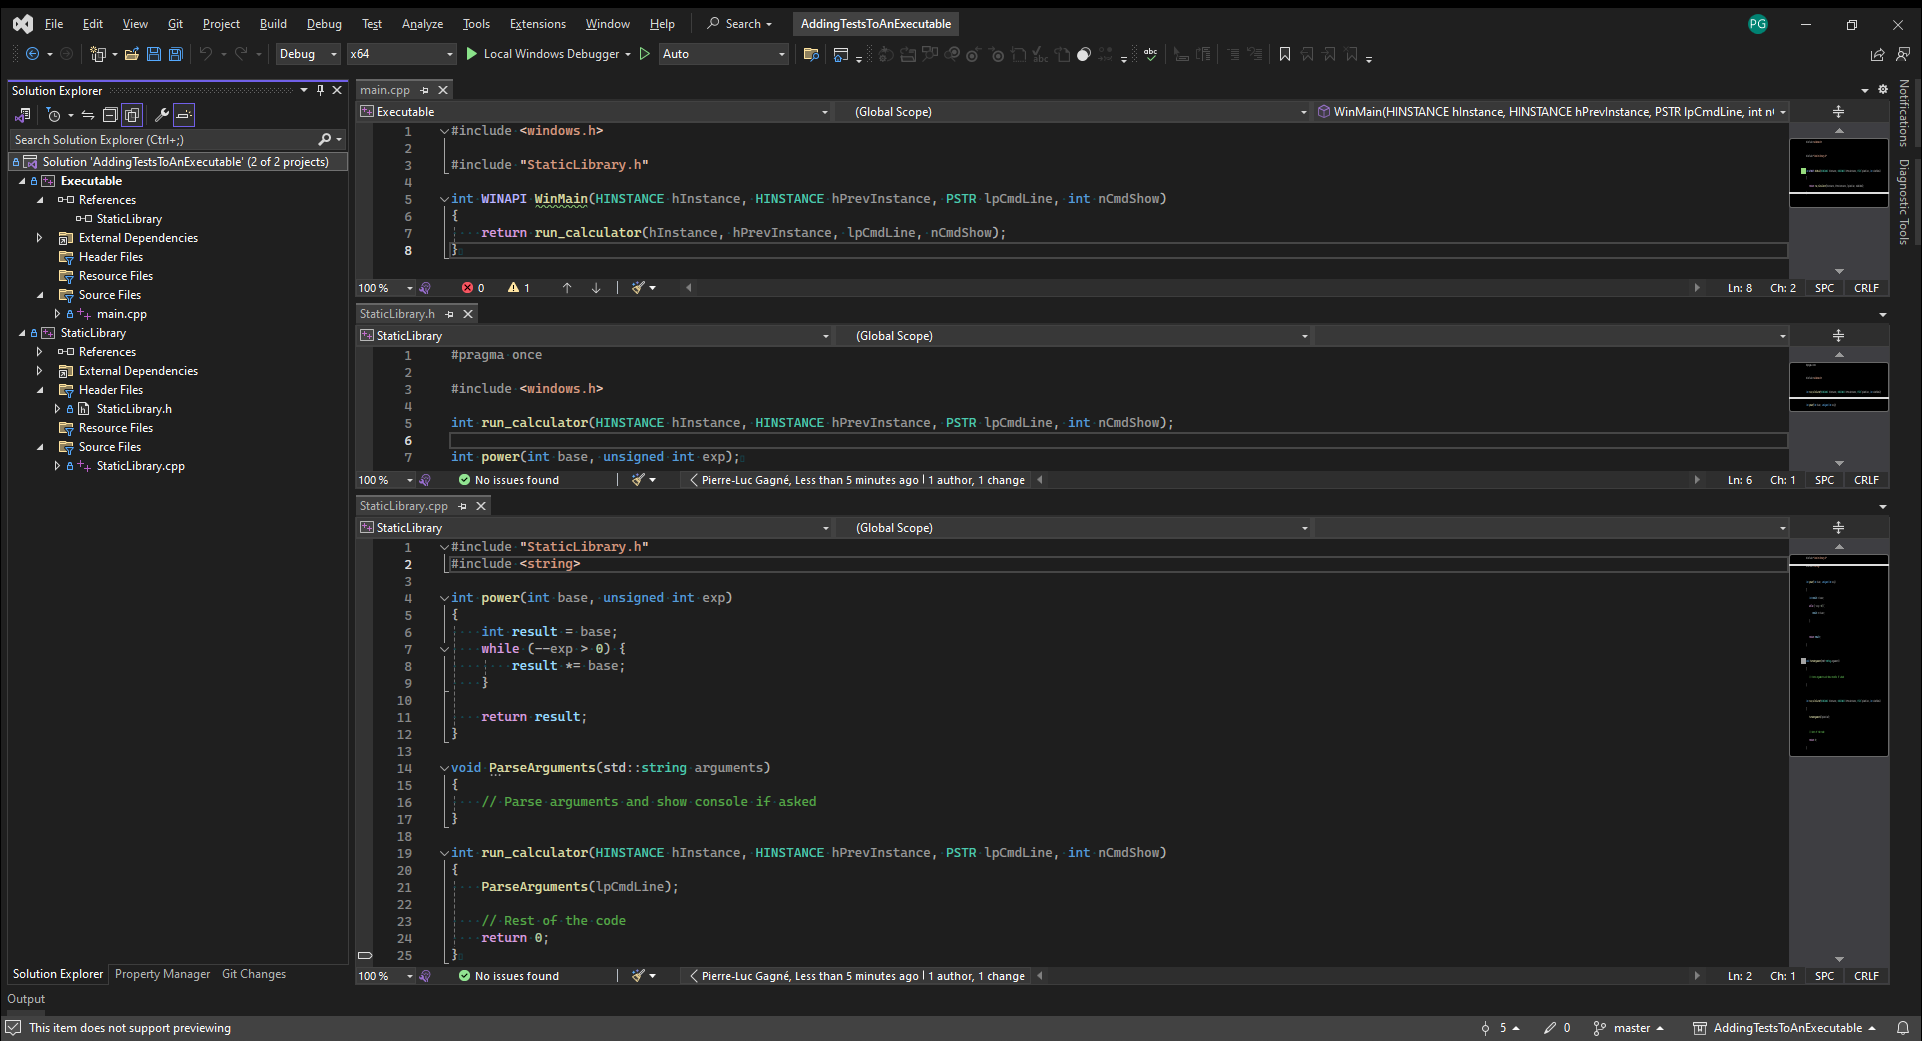
- Move the code from the executable to the library project.
- Rename the main function to something significant. For this example, I will use run_calculator.
- Create a main function in the executable project that will call the function run_calculator.
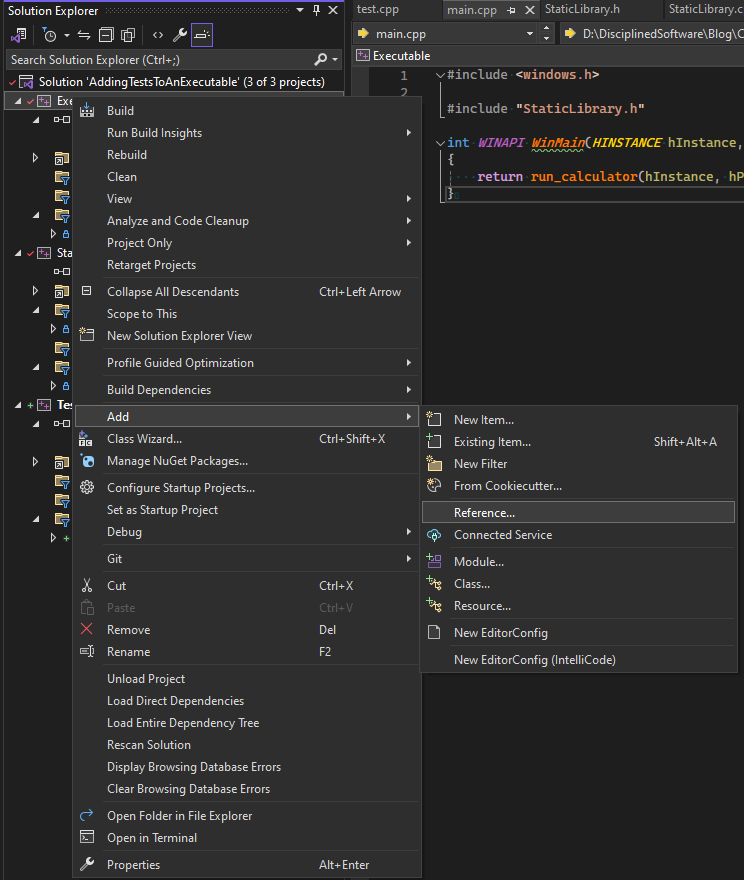
- Add a reference in the executable project to the library project.
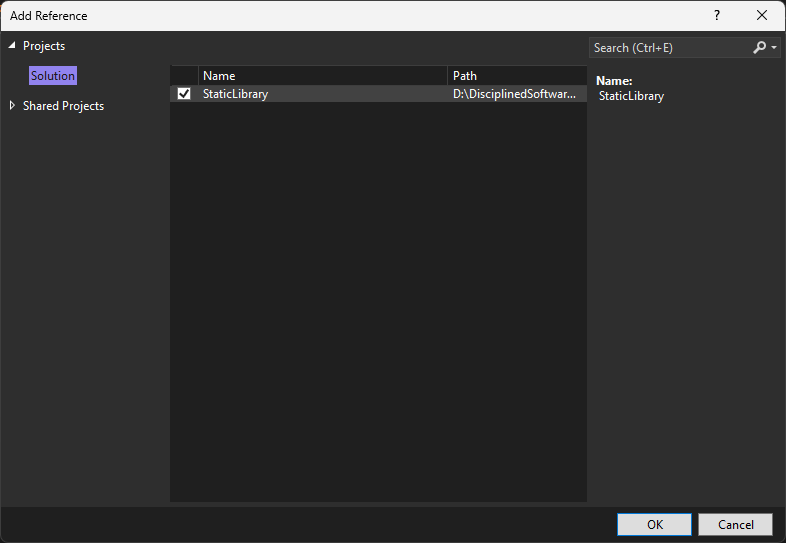
- Add the static library include path to the executable project properties.
- Open the project properties.

- Select All Configurations.
- Add the static library include path to the Additional Include Directories property in the C/C++/General pane.
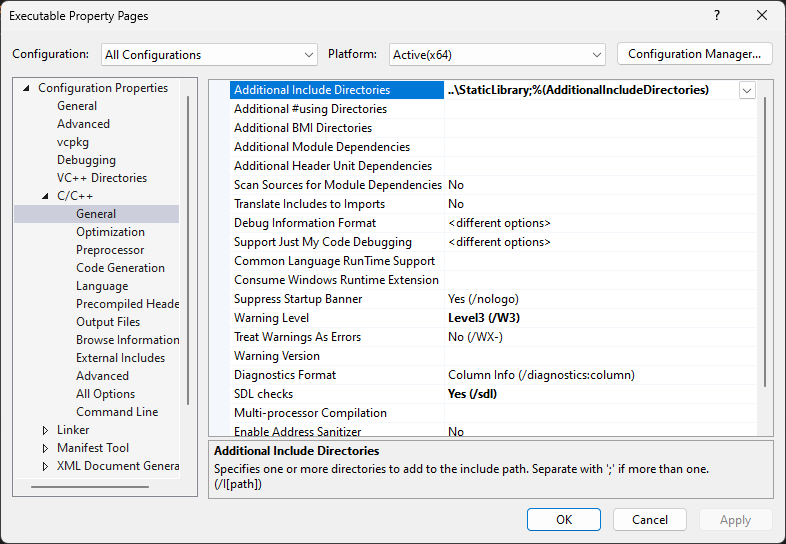
- Apply and close the Properties dialog.
- Open the project properties.
- Create the test project.
- Add a new project.

- Select the Empty Project project template.
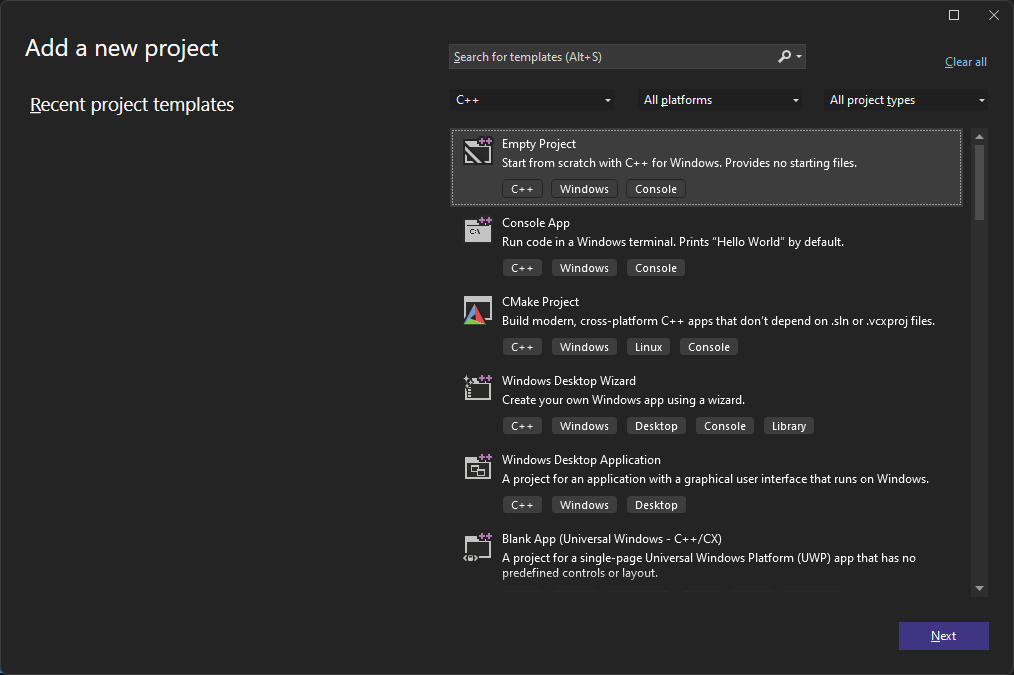
- Add a new project.
- Add tests in the test project.
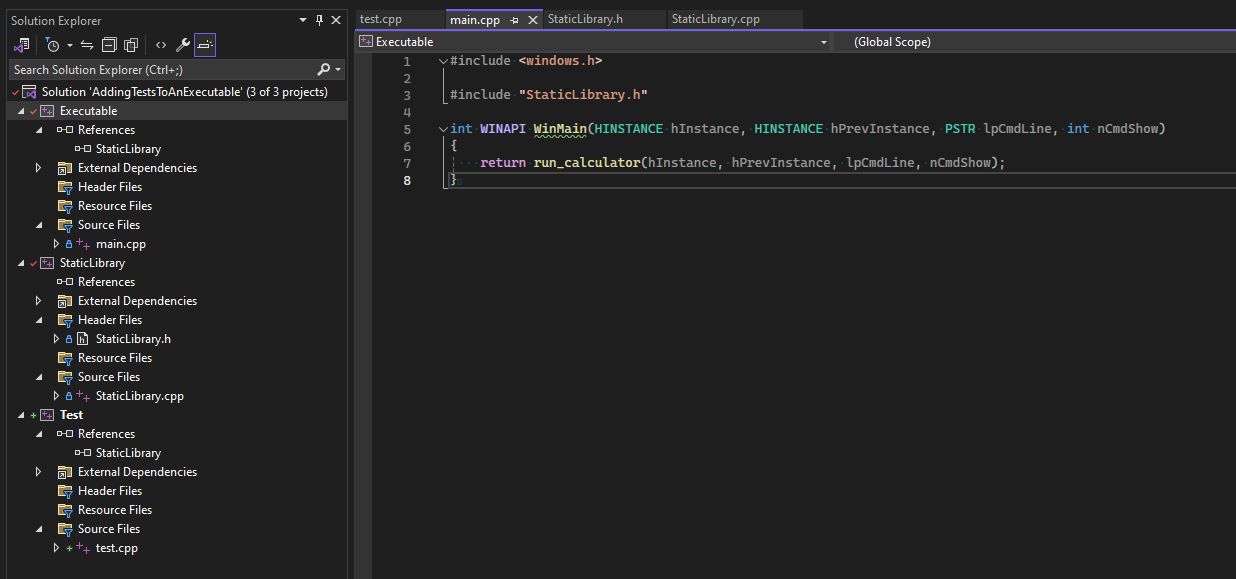
- Add a reference in the test project to the library project.
- Add the static library include path to the test project properties.
- Execute the Test project to make sure that everything is working as expected.

Conclusion
The main reasons to have all your code in libraries are testability and reusability. Since the code resides in libraries you can call them from your tests and test their behavior. Code that resides in libraries can also be reused for other executables or libraries that you will build in the future.